Topalov + Endgame Ernie + The QNP
By on 01 May 12 17:36

7549 views | 5 edits | Last edit on 25 Jun 15 20:16
VeselinTopalov gave a simultaneous at the Edinburgh Chess Club
on Sunday the 29th April 2012.
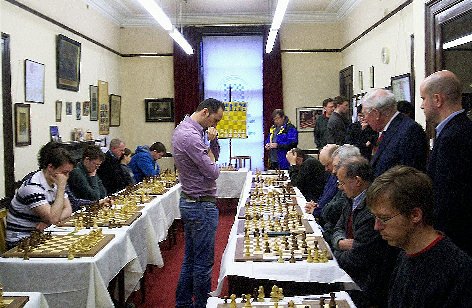
Loads of players wanted to play him and the lucky names were pulled out of hat.
My mate Alastair White got his chance.
Alastair has a good record v GM’s in simuls.
He once swindled Smyslov in a Rook ending and has draws v Alexey Suetin and Leonid Stein.
Here is a picture of Topalov making his 39th move.
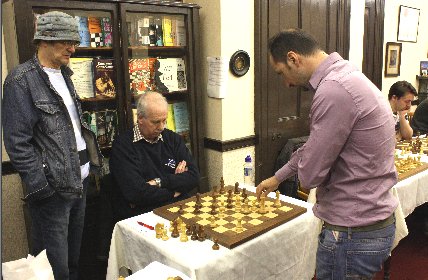
That mug in the hat is me.
V. Topalov - A. White Simultaneous Edinburgh 2012.
For more details and a game Topalov played against a RHP member see:
Thread 146413

OK we have seen the good guys in action, time to catch up on the blunders
and brilliancies played in the RHP 2012 Championship.
Jon March - dabensta RHP CH 2012
Where we see The Curse of the Queen’s Knight Pawn claiming yet another victim.
I could do 10 blogs on players losing due to them snatching the QNP.
Mind you there are always exceptions…..
It is now my great pleasure to introduce to you and welcome to the blog
ricewind1972 and the square b2 (and b7) .
The square b2 and Ricewind are joined at the hip.
I give you five checkmate positions from the 2012 Championship with
ricewind getting mated by a piece on his favourite squares.
Final position ricewind1972 - johneb RHP Ch 2012
Final position ricewind1972 - RHP Ch 2012
Final position ricewind1972 - notmyrookplease RHP Ch 2012
And a couple as Black.
Final position d36366 - ricewind1972 RHP Ch 2012
Final position individ - ricewind1972 RHP Ch 2012
But we end on a happy note. A ricewind mate. On g7!
Final position ricewind1972 - mishkablue RHP Ch 2012
GAPAC - Joe McD RHP Ch 2012
Here is the situation. Black can move his Knight and win the White Queen or move
his Knight and lose his own Queen. (guess what happened?)
Black to play and win. 18…Nxg3+ wins the White Queen. 0-1.
But instead Black played 18…Ng5 and lost his Queen 1-0
Next we see Black chucking a half point out of the window.
DanTrz - happybvr RHP Ch 2010
Next we see Black chucking a full point out of the window.
Radon - MrVarnell RHP Ch 2010
Next we see Black chucking his King out of the window.
Toto1979 - Fylgja RHP Ch 2012
Now look at this position. (Black to play)
Look at those triple g-pawns. Endgame Ernie (you will meet him later)
will be drooling into his tea at the sight of those pawns.
Yes tripled pawns are weak but often it’s best not go for them right away.
White cannot capture them.
They are a brick wall as far as the White pieces are concerned.
Black illustrates how with some alert play.
dartsman - inkdot RHP Ch 2012
Wotcha Wood Shifters.
Holly Macaroni! Did you see those triple pawns in the last game. Yummy yum yum.
Thanks greenpawn for that diagram. Infact I’m going to look at it again.
Oh too much I can hardly contain myself, look at those g-pawns.,
will you just look at those g-pawns, those lovely…..
(Get on with it you nerd else I won’t invite you back….greenpawn)
We all know two connected pawns on the 6th rank beat a Rook.
Even with Black to move they cannot stop at least one pawn from promoting.
So what about two disconnected pawns v two Rooks?
Mister Biggins - fredweasley RHP Ch 2012
In the next very interesting ending we shall see…
(Oh no we won’t….Get Lost….greenpawn.)
chmrjg - Shelrock57 RHP Ch 2012
If this had been an OTB game I would have suspected mutual time trouble.
The game ended in a draw but both sides missed winning shots within a few
moves of each other.
First to fail to see his shot was White.
Now to see what did happen and Black’s missing a clear win.
We show another game that features tripled pawns, this time c-pawns.
White starts messing about in the opening and he should have lost his Queen.
Instead it is Black who drops his Queen.
White cannot believe his luck and wraps up the game.
The tripled c-pawns actually play a very little part in the game.
The funny bit comes when White evens then out for Black.
Motividan - veca RHP Ch 2012
The thread accompanying this blog is Thread 146448
on Sunday the 29th April 2012.
Loads of players wanted to play him and the lucky names were pulled out of hat.
My mate Alastair White got his chance.
Alastair has a good record v GM’s in simuls.
He once swindled Smyslov in a Rook ending and has draws v Alexey Suetin and Leonid Stein.
Here is a picture of Topalov making his 39th move.
That mug in the hat is me.
V. Topalov - A. White Simultaneous Edinburgh 2012.
For more details and a game Topalov played against a RHP member see:
Thread 146413
OK we have seen the good guys in action, time to catch up on the blunders
and brilliancies played in the RHP 2012 Championship.
Jon March - dabensta RHP CH 2012
Where we see The Curse of the Queen’s Knight Pawn claiming yet another victim.
I could do 10 blogs on players losing due to them snatching the QNP.
Mind you there are always exceptions…..
It is now my great pleasure to introduce to you and welcome to the blog
ricewind1972 and the square b2 (and b7) .
The square b2 and Ricewind are joined at the hip.
I give you five checkmate positions from the 2012 Championship with
ricewind getting mated by a piece on his favourite squares.
Final position ricewind1972 - johneb RHP Ch 2012
Final position ricewind1972 - RHP Ch 2012
Final position ricewind1972 - notmyrookplease RHP Ch 2012
And a couple as Black.
Final position d36366 - ricewind1972 RHP Ch 2012
Final position individ - ricewind1972 RHP Ch 2012
But we end on a happy note. A ricewind mate. On g7!
Final position ricewind1972 - mishkablue RHP Ch 2012
GAPAC - Joe McD RHP Ch 2012
Here is the situation. Black can move his Knight and win the White Queen or move
his Knight and lose his own Queen. (guess what happened?)
Black to play and win. 18…Nxg3+ wins the White Queen. 0-1.
But instead Black played 18…Ng5 and lost his Queen 1-0
Next we see Black chucking a half point out of the window.
DanTrz - happybvr RHP Ch 2010
Next we see Black chucking a full point out of the window.
Radon - MrVarnell RHP Ch 2010
Next we see Black chucking his King out of the window.
Toto1979 - Fylgja RHP Ch 2012
Now look at this position. (Black to play)
Look at those triple g-pawns. Endgame Ernie (you will meet him later)
will be drooling into his tea at the sight of those pawns.
Yes tripled pawns are weak but often it’s best not go for them right away.
White cannot capture them.
They are a brick wall as far as the White pieces are concerned.
Black illustrates how with some alert play.
dartsman - inkdot RHP Ch 2012
Wotcha Wood Shifters.
Holly Macaroni! Did you see those triple pawns in the last game. Yummy yum yum.
Thanks greenpawn for that diagram. Infact I’m going to look at it again.
Oh too much I can hardly contain myself, look at those g-pawns.,
will you just look at those g-pawns, those lovely…..
(Get on with it you nerd else I won’t invite you back….greenpawn)
We all know two connected pawns on the 6th rank beat a Rook.
Even with Black to move they cannot stop at least one pawn from promoting.
So what about two disconnected pawns v two Rooks?
Mister Biggins - fredweasley RHP Ch 2012
In the next very interesting ending we shall see…
(Oh no we won’t….Get Lost….greenpawn.)
chmrjg - Shelrock57 RHP Ch 2012
If this had been an OTB game I would have suspected mutual time trouble.
The game ended in a draw but both sides missed winning shots within a few
moves of each other.
First to fail to see his shot was White.
Now to see what did happen and Black’s missing a clear win.
We show another game that features tripled pawns, this time c-pawns.
White starts messing about in the opening and he should have lost his Queen.
Instead it is Black who drops his Queen.
White cannot believe his luck and wraps up the game.
The tripled c-pawns actually play a very little part in the game.
The funny bit comes when White evens then out for Black.
Motividan - veca RHP Ch 2012
The thread accompanying this blog is Thread 146448
